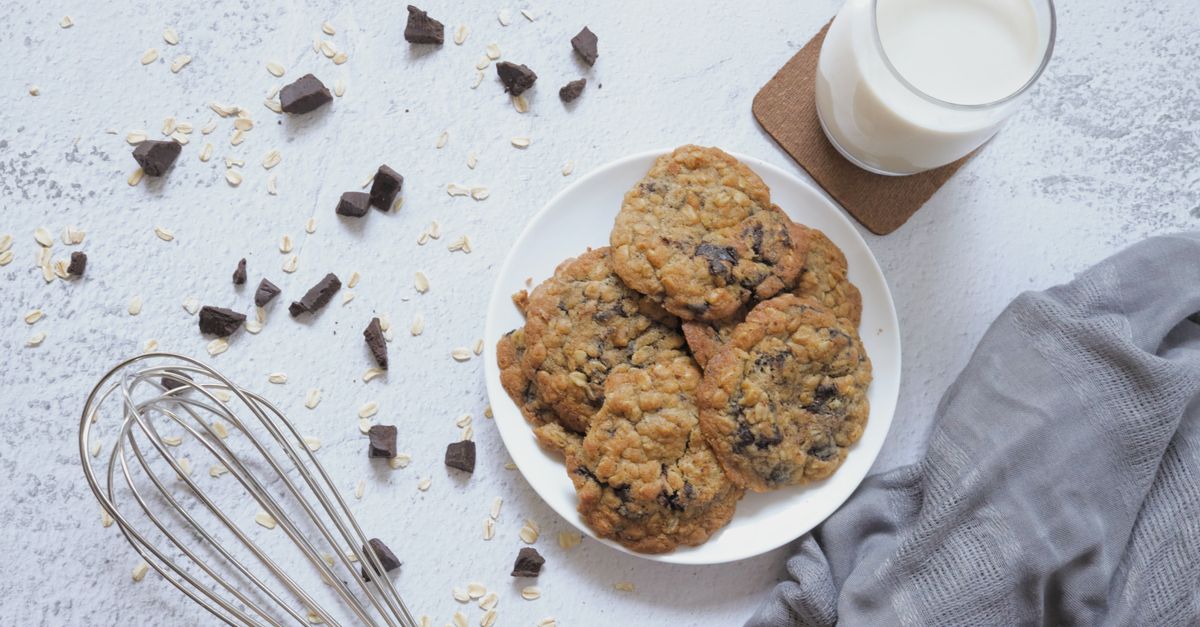
Why Your Homemade Cookies Are Flat (And The Simple Fixes That Guarantee Perfect, Puffy Results Every Time)
Every home baker dreams of that perfect, plump, chewy cookie – the kind with a slight dome, a tender interior, and just the right amount of chew. But if you’re like most people, you’ve probably pulled countless cookie sheets from the oven only to find a sad landscape of thin, crispy, flat discs. It’s disheartening, frustrating, and often leaves you wondering if your oven is broken or if you’re just destined for crunchy disappointments. I’ve been there, staring at a tray of what were supposed to be glorious chocolate chip cookies, only to find them melted into a greasy, uniform expanse. For years, I blamed my recipes, my oven, even the phase of the moon. What I didn’t realize was that the culprits were often subtle, yet critical, mistakes I was making in the kitchen that sabotaged my cookies before they even hit the oven. Once I understood these nuances, my cookie game changed entirely. Now, every batch emerges golden, puffy, and perfectly chewy, just like they should be.
Key Takeaways
- Control Butter Temperature: Softened butter (67°F) is crucial; melted or too-cold butter prevents proper aeration and emulsification, leading to flat cookies.
- Chill Your Dough: Refrigerating cookie dough firms up the butter, preventing excessive spread in the oven and allowing ingredients to hydrate.
- Measure Flour Precisely: Too little flour means insufficient structure; use a kitchen scale or the spoon-and-level method for accuracy.
- Avoid Over-Creaming: Over-beating butter and sugar incorporates too much air, which collapses during baking, causing flatness.
- Check Your Leavening: Ensure baking soda and baking powder are fresh and correctly balanced for proper lift and spread control.
The Butter Temperature Trap: It’s Not Just ‘Softened’
When a recipe calls for “softened butter,” most people pull it from the fridge, let it sit on the counter for 10-15 minutes, give it a poke, and decide it’s ready. In my experience, this is the number one mistake that leads to flat cookies. Butter that is too warm (even slightly melted) or too cold will fundamentally alter the creaming process and, consequently, your cookie’s structure.
Think about what happens when you cream butter and sugar. You’re not just mixing them; you’re incorporating tiny air pockets into the butter. These air pockets are critical for the cookie’s lift and chewiness. If your butter is too cold, it won’t cream properly with the sugar, resulting in fewer air pockets. If it’s too warm or even slightly melted, the butter cannot hold those air pockets effectively. It will separate from the sugar, leading to a greasy, dense mixture that spreads excessively in the oven.
What changed everything for me was learning the precise temperature for softened butter: 67°F (19-20°C). It should be pliable enough to leave an indentation with your finger, but still cool to the touch and hold its shape. If it’s glistening, oily, or collapsing, it’s too warm. If it snaps when you bend it, it’s too cold. I now use a small kitchen thermometer to check, or if I don’t have one handy, I rely on the “bend test”: a stick of butter should bend without breaking, but still offer resistance. If you’re short on time, cut your butter into small cubes; it will soften much faster at room temperature.
The Chilling Imperative: Your Dough Needs a Break
I used to be impatient. I’d mix up a batch of cookie dough and immediately scoop it onto a sheet, eager for fresh-baked treats. This, I quickly learned, was another critical error. Chilling your cookie dough isn’t an optional step; it’s a structural necessity for plump, chewy cookies.
There are two main reasons why chilling makes such a dramatic difference. First, it firms up the butter in the dough. When cold butter hits a hot oven, it takes longer to melt. This slow melt gives your cookie dough time to set around those precious air pockets and develop structure before the butter fully spreads. Without chilling, warm butter melts too quickly, causing your cookies to flatten out into thin puddles before they have a chance to rise.
Second, chilling allows the flour to fully hydrate. This means the flour absorbs moisture from the wet ingredients, which helps develop gluten and creates a more tender, chewy texture. It also deepens the flavor, as the ingredients have time to meld. I aim for at least 30 minutes in the fridge, but for truly outstanding results, an hour or even overnight can be transformative. I often make my dough a day in advance, portion it out onto baking sheets lined with parchment paper, and then pop the whole tray into the fridge. This way, the moment I’m ready to bake, I just transfer the chilled dough balls straight into the oven.
Flour Power: Precision Over Estimation
Flour provides the structural backbone of your cookies. Too little flour, and your cookies won’t have the necessary support to hold their shape, leading to – you guessed it – flatness. Too much, and they’ll be dry and crumbly. The problem, in my experience, is that most home bakers incorrectly measure flour.
Scooping flour directly from the bag with your measuring cup compacts it, meaning you’re adding significantly more flour than the recipe intends. This is the number one reason recipes can be inconsistent. What works? A kitchen scale is the most accurate method. If a recipe provides weight measurements (e.g., 120g flour), use them. If not, invest in a scale; it’s a game-changer for baking precision.
If a scale isn’t an option, use the spoon-and-level method. Gently spoon flour into your dry measuring cup until it’s overflowing, then use the straight edge of a knife or a flat spatula to level off the top. Never pack it down or tap the cup. This method ensures you’re getting closer to the correct volume. I can’t emphasize enough how much of a difference this seemingly small detail makes. It’s the difference between a sad, deflated cookie and a beautifully structured, puffy one.
The Over-Creaming Overkill: Less Air, More Structure
It’s easy to think that more creaming means more air, and more air means fluffier cookies, right? Wrong. In my early baking days, I’d beat the butter and sugar for what felt like an eternity, aiming for a super light and fluffy mixture. The mistake I see most often is over-creaming the butter and sugar, especially in recipes calling for baking soda or baking powder.
While you do want to aerate the butter and sugar, there’s a point of diminishing returns. Over-creaming incorporates too much air, which, counter-intuitively, can lead to flatter cookies. That excess air creates an unstable structure that collapses in the oven as the leavening agents do their work. The result? A cookie that rises quickly then falls, spreading out rather than holding its dome. What changed everything for me was learning to cream until the mixture is just combined, pale, and fluffy, typically 2-3 minutes at medium speed. Stop as soon as it reaches that point. Don’t push it. This leaves enough room for the leavening agents to provide the final lift, creating that ideal puffy texture.
The Leavening Ledger: Freshness and Balance Matter
Baking soda and baking powder are your cookie’s personal lifters. If they’re old, unbalanced, or incorrectly used, your cookies will inevitably fall flat. This is a common pitfall because these ingredients often sit in our pantries for months, slowly losing their potency.
Freshness is paramount. Baking soda lasts about 6 months, and baking powder about 9-12 months once opened. To test baking soda, add a teaspoon to a small bowl with a splash of vinegar; it should bubble vigorously. For baking powder, do the same with hot water. If there’s no fizz, it’s time for a new box.
Beyond freshness, the balance of leavening agents matters. Baking soda reacts with acids (like brown sugar, buttermilk, or natural cocoa powder) to produce carbon dioxide, which gives lift. Baking powder is double-acting, meaning it reacts once when wet and again when heated. Many recipes use both to achieve a specific rise and texture. If your recipe uses an acidic ingredient but relies solely on baking powder, or vice-versa, your cookies might not get the necessary lift. Stick precisely to the amounts specified. Don’t add a little extra baking soda hoping for more puff; it can cause a metallic taste and lead to a rapid, then collapsing, rise. What truly works is to respect the recipe’s specified quantities and ensure your leavening agents are always fresh. I always write the date I opened a box of leavening on the lid with a permanent marker to easily track its freshness.
Frequently Asked Questions
Q: Can using the wrong type of sugar affect how flat my cookies are?
A: Yes, absolutely. Brown sugar contains molasses, which adds moisture and a slight acidity that reacts with baking soda, promoting chewiness and a more controlled spread. Granulated sugar, being purely sucrose, tends to make cookies spread more and become crisper. If you swap granulated for brown sugar, or change the ratio significantly, it will alter the cookie’s texture and spread, often leading to flatter results if too much granulated sugar is used without accounting for it.
Q: My cookies are flat even after chilling the dough. What else could be wrong?
A: If chilling isn’t enough, revisit your butter temperature and creaming technique. Even slightly warm butter before chilling can contribute to flatness. Also, ensure your flour is measured accurately (use a scale!). Your oven temperature might also be off; an oven that isn’t hot enough can cause cookies to spread before they set. Using a separate oven thermometer is a great way to verify your oven’s true temperature.
Q: Should I use parchment paper or silicone mats for baking cookies?
A: Both are excellent for preventing sticking. However, in my experience, parchment paper tends to yield slightly puffier cookies for two reasons: it offers a little more grip for the dough, which helps resist spreading, and it’s a slightly better insulator than silicone, allowing the cookie bottoms to set a bit slower. Silicone mats are great, but sometimes can promote a bit more spread due to their non-stick surface. If you’re struggling with flatness, try parchment paper.
Q: Does the type of baking sheet matter?
A: Yes, it can. Darker baking sheets absorb more heat, which can lead to faster browning and sometimes more spread if the cookies cook too quickly on the bottom before setting. Lighter, reflective baking sheets help prevent over-browning and promote a more even cook, which can aid in maintaining a puffier shape. Always use good quality, heavy-gauge aluminum baking sheets for the most consistent results.
Q: My cookie dough is very sticky after mixing. Is this normal?
A: Some cookie doughs are naturally stickier, especially those with a higher ratio of butter or moist ingredients. However, if it’s excessively sticky, it could indicate too little flour (re-check your measurement!) or butter that was too warm initially. Chilling the dough extensively will help firm it up and make it easier to handle, but if it’s truly liquidy, you might need to add a tiny bit more flour, spoon-and-leveled, until it reaches a manageable consistency.
Conclusion: Mastering the Art of the Puffy Cookie
Baking perfect, puffy cookies consistently feels like a magic trick, but it’s really a science. It’s about respecting the ingredients and understanding how small variables impact the final outcome. The journey from flat, crispy disappointments to consistently plump, chewy delights isn’t about finding a ‘secret’ ingredient; it’s about mastering the fundamentals: butter temperature, dough chilling, precise flour measurement, controlled creaming, and fresh leavening. These aren’t just tips; they are the pillars upon which every great cookie stands. Next time you bake, pay close attention to these crucial steps. You’ll be amazed at how a little precision can transform your cookies from sad discs to bakery-worthy masterpieces. Your taste buds—and your guests—will thank you.
Written by Sarah Chen
Home organization and productivity
A former consumer affairs journalist, Sarah has a knack for dissecting complex topics into digestible, actionable steps.
You Might Also Like
Why Your Homemade Bread is Dry and Crumbly (And The Simple Shifts That Guarantee a Light, Airy Loaf Every Time)
Stop making dry, crumbly homemade bread. Learn the simple shifts in technique and ingredients that guarantee a light, airy loaf every time.

Why Your Home Still Feels Stuffy (Even After Cleaning) — And What Actually Works for Real Freshness
Discover the hidden culprits making your home feel stuffy even after cleaning. Learn practical solutions for lasting freshness and better indoor air quality.

Why Your Home Still Feels Dusty (Even After Cleaning) — And The Hidden Culprits Nobody Talks About
Ever wonder why your home is still dusty after a deep clean? Discover the overlooked sources and counter-intuitive fixes for a truly dust-free environment.