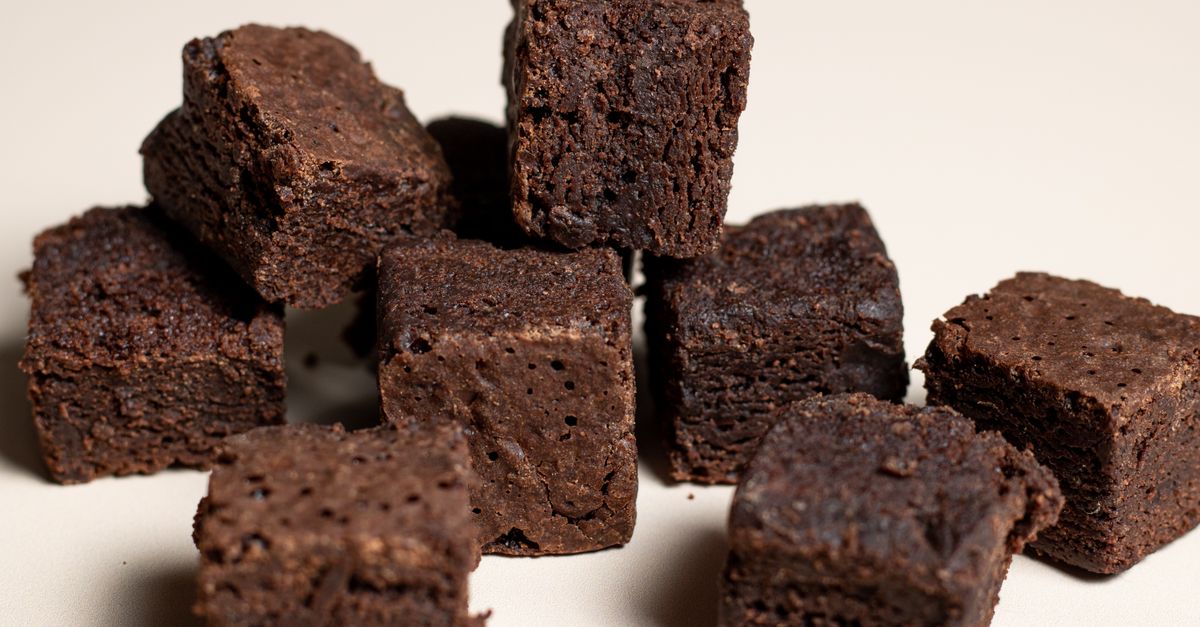
Why Your Homemade Brownies Are Cakey (And The Simple Shifts That Guarantee Fudgy Perfection Every Time)
Are you constantly chasing that elusive, rich fudginess in your homemade brownies, only to pull a batch of dry, cake-like squares from the oven? I know the frustration. For years, my brownies were a source of quiet disappointment. They were fine, but they never had that intense, melt-in-your-mouth denseness that made them truly irresistible. I followed recipes to the letter, used good quality chocolate, and still, cakey brownies prevailed. It felt like a conspiracy.
What I’ve learned through countless batches and a deep dive into the science of baking is that the common culprits aren’t always obvious. It’s not usually about exotic ingredients or a secret technique passed down through generations. Instead, it often boils down to a few fundamental, yet frequently overlooked, elements that dramatically influence texture. These aren’t just tips; they’re shifts in approach that changed my brownie game entirely. If you’re ready to banish cakey brownies forever and embrace a world of dense, gooey, chocolatey bliss, read on.
Key Takeaways
- Prioritize fat over flour and sugar in your recipe ratios to minimize gluten development and maximize fudginess.
- Avoid aerating your batter excessively; over-mixing incorporates air, leading to a lighter, cake-like crumb.
- Understand that doneness is key: underbaking slightly is critical for fudgy brownies, as they continue to set outside the oven.
- Adjust your baking pan material and oven temperature for optimal heat distribution and moisture retention.
The Hidden Role of Ingredient Ratios: Fat Over Flour
When I first started baking, I thought all brownie recipes were more or less interchangeable. Flour, sugar, eggs, butter, chocolate – mix, bake, done. The reality is, the ratio of these ingredients is the single most critical factor in determining your brownie’s final texture. Most cakey brownie recipes lean too heavily on flour and sugar, and not enough on fat.
Think about it: cake relies on flour for structure and aeration, resulting in a lighter, airier crumb. Brownies, particularly fudgy ones, are the antithesis of cake. They want to be dense. To achieve this, you need to minimize gluten development (which comes from flour) and maximize richness (from fat and melted chocolate).
The mistake I see most often is a recipe with too much flour. Flour provides structure, and too much will give your brownies a cake-like lift and chew. A truly fudgy brownie recipe will have a higher fat-to-flour ratio. This means more butter, more melted chocolate (which contains cocoa butter), and often a slightly higher sugar content (sugar helps retain moisture and prevents excessive gluten formation) relative to the flour.
What changed everything for me was actively seeking out recipes that feature a low flour-to-fat ratio. Look for recipes where the weight of butter and melted chocolate combined significantly exceeds the weight of the flour. For instance, if a recipe calls for 1 cup (125g) of flour, it should ideally call for at least 1 cup (226g) of butter and 8-12 ounces (225-340g) of chocolate. This flood of fat effectively coats the flour particles, inhibiting gluten formation and creating that desirable dense, fudgy texture. Don’t be afraid of the butter and chocolate quantities – that’s where the magic lies.
The Silent Killer of Fudginess: Over-Aeration
Many baking guides emphasize creaming butter and sugar until light and fluffy for cakes. For brownies, this is a death sentence to fudginess. The goal of creaming is to incorporate air, and air leads to lift, lightness, and ultimately, cakey texture.
My early brownie attempts always started with enthusiastically beating butter and sugar. I was convinced more creaming meant a better result. What I didn’t realize was that I was actively working against the very texture I craved. Every minute I spent whipping those ingredients, I was building in air pockets that would expand in the oven, giving my brownies an unwanted rise.
The mistake here is treating brownie batter like cake batter. For fudgy brownies, minimal aeration is key. You want to mix ingredients to combine them, not to whip them. When adding eggs, whisk them just enough to break them up before incorporating them into the batter. Once the flour is added, mix just until no dry streaks remain. Over-mixing after the flour is in also develops gluten, leading to tougher, chewier (in a bad way) brownies.
What changed everything for me was switching to a whisk-only method for initial wet ingredients, and then a spatula for the dry ingredients. Instead of an electric mixer, I use a sturdy whisk to combine melted butter, sugar, and eggs. This provides enough mixing to emulsify, but crucially, avoids incorporating excess air. When the dry ingredients go in, I switch to a rubber spatula and fold gently until everything is just combined. A few visible streaks of flour are better than a fully homogenized, airy batter at this stage; they’ll disappear during baking.
The Counter-Intuitive Truth: Underbake for Ultimate Fudginess
This is perhaps the most difficult mental shift for many bakers, myself included initially. We’re taught to bake until a toothpick comes out clean. For cakes, this is correct. For fudgy brownies, it’s a disaster.
When a toothpick comes out clean from a brownie, it means it’s already overbaked. Brownies continue to cook and set as they cool, a phenomenon known as carryover baking. If they’re perfectly done in the oven, they’ll be dry and cakey on the counter.
The mistake is waiting for that ‘clean toothpick’ moment. I used to pull my brownies when the toothpick was completely free of wet batter, sometimes with just a few moist crumbs clinging to it. This guaranteed a cake-like crumb every single time.
What changed everything for me was learning to embrace the moist crumb test. For truly fudgy brownies, you want to pull them from the oven when a toothpick inserted into the center comes out with moist, fudgy crumbs still clinging to it, or even some wet batter if you prefer truly gooey centers. The edges should be set, but the center should still look a little jiggly. This might feel uncomfortable at first, but trust the process. As they cool, that moist center will set into perfect fudginess.
Aim for a baking time that’s 5-10 minutes less than what many recipes recommend, and always prioritize the visual and toothpick test over a strict timer. For most brownie recipes in an 8x8 or 9x13 pan, this means pulling them around the 25-30 minute mark, even if the recipe says 35-40. Start checking early, often after 20 minutes, especially if you know your oven runs hot.
The Unsung Heroes: Pan Material and Oven Temperature
While ingredient ratios and mixing are paramount, the tools and environment you use play a significant supporting role in achieving fudgy brownies. I once thought a pan was just a pan, and my oven was just… an oven. I was wrong.
Different pan materials conduct heat differently. A thin, light-colored metal pan might bake faster and promote crispier edges, but can also dry out the center if not monitored. A dark-colored metal pan absorbs more heat, potentially leading to overbaked edges before the center is done. Glass pans, while great for heat retention once hot, take longer to heat up and can lead to uneven baking.
The mistake I often made was using the wrong pan for the desired outcome and not accounting for my oven’s quirks. My old light-colored metal pans were notorious for drying out the edges while the center was still undercooked, leading to an inconsistent, less-than-fudgy result.
What changed everything for me was switching to a heavy, anodized aluminum pan. These pans conduct heat evenly, preventing hot spots and promoting a uniform bake. For an even more intense fudginess, a ceramic pan can also work well due to its excellent heat retention. Always line your pan with parchment paper, leaving an overhang on two sides; this not only prevents sticking but also helps insulate the edges and makes lifting the cooled brownies out incredibly easy.
Beyond the pan, oven temperature is crucial. Most brownie recipes call for 350°F (175°C). However, if your oven runs hot (many do), those brownies might be overbaked and cakey before you even realize it. Invest in an inexpensive oven thermometer to verify your actual oven temperature. I found my oven consistently ran 25 degrees hotter than its dial indicated, which explained a lot of my past baking failures. Adjust your oven temperature accordingly, either up or down, based on your thermometer’s reading. A slightly lower, more consistent temperature can sometimes promote a more even and fudgier bake, especially for larger batches.
Troubleshooting Common Brownie Woes
Even with these shifts, you might run into specific issues. Here are some quick troubleshooting tips based on my experience:
- Brownies are too dense/hard (not fudgy): This usually points to over-mixing the flour, developing too much gluten. Remember to mix just until combined. It could also mean too little fat in the recipe or overbaking.
- Brownies are crumbly: Too much flour, not enough fat, or significantly overbaked. Revisit your recipe ratios and baking time.
- Brownies have a ‘crusty’ top but are still cakey inside: This is often a sign of too much air incorporated into the batter (over-aeration of butter/sugar/eggs) combined with a baking temperature that’s a bit too high, setting the top quickly but drying out the interior.
- Brownies are greasy: Too much fat for the other ingredients, or the butter/oil wasn’t properly emulsified. Ensure butter and sugar are thoroughly combined before adding eggs.
Ultimately, baking fudgy brownies is a delicate balance of ratios, gentle handling, and precise timing. It took me many trials (and delicious errors!) to understand these nuances. But once you internalize these principles, you’ll find yourself consistently producing those perfectly dense, intensely chocolatey, fudgy brownies that everyone raves about. It’s a skill worth mastering for any home baker.
Frequently Asked Questions
Q: Can I use cocoa powder instead of melted chocolate for fudgy brownies?
A: While you can make brownies with just cocoa powder, achieving true fudginess is much easier with a significant amount of melted chocolate. Melted chocolate provides cocoa butter, which is a key fat for that dense, rich texture. Cocoa powder-only brownies tend to be lighter and more cake-like due to the lack of this extra fat. For optimal fudginess, use a combination of good quality melted chocolate and a small amount of cocoa powder for depth of flavor.
Q: Why do my brownies have a cracked, shiny top sometimes, but not always?
A: The elusive shiny, cracked top is often a sign of a high sugar content and proper aeration (but not over aeration). When sugar dissolves and then rapidly heats, it forms a thin, glassy meringue-like crust on top. Recipes with more sugar and those where the eggs and sugar are mixed well (but not whipped to incorporate too much air) tend to produce this desirable texture. Some bakers even lightly whisk eggs and sugar over a double boiler until warm before combining with other ingredients to encourage this effect.
Q: Does the type of sugar affect brownie texture?
A: Yes, it can. Granulated sugar provides crispness and contributes to that shiny top. Brown sugar, with its molasses content, adds moisture and a chewier texture. Many fudgy brownie recipes use a combination of both to get the best of both worlds: a shiny top and a moist, chewy interior. Stick to the sugar types and amounts specified in a well-tested recipe for best results.
Q: My recipe calls for oil instead of butter. Will that still make fudgy brownies?
A: Oil can certainly make fudgy brownies, as it’s 100% fat and contributes to a very moist, dense texture. However, butter often provides a richer, more complex flavor profile due to its milk solids. If your recipe calls for oil, stick with it, but know that butter-based brownies generally offer a superior taste. If you’re adapting a recipe, ensure the fat ratio remains consistent in terms of weight.
Q: How long should brownies cool before cutting them?
A: Patience is crucial here! For the fudgiest, cleanest cuts, brownies should be completely cooled, ideally for at least 2-3 hours, or even chilled in the refrigerator for 30-60 minutes. Warm brownies will be very soft and prone to crumbling and sticking to the knife. Cooling allows them to fully set, making for neat, perfectly textured squares.
Written by Sarah Chen
Home organization and productivity
A former consumer affairs journalist, Sarah has a knack for dissecting complex topics into digestible, actionable steps.
You Might Also Like
Why Your Homemade Bread is Dry and Crumbly (And The Simple Shifts That Guarantee a Light, Airy Loaf Every Time)
Stop making dry, crumbly homemade bread. Learn the simple shifts in technique and ingredients that guarantee a light, airy loaf every time.
Why Your Homemade Cookies Are Flat (And The Simple Fixes That Guarantee Perfect, Puffy Results Every Time)
Tired of flat, crispy cookies? Discover the crucial baking mistakes that cause spread and learn the simple fixes for perfect, puffy cookies every time.

Why Your Home Still Feels Stuffy (Even After Cleaning) — And What Actually Works for Real Freshness
Discover the hidden culprits making your home feel stuffy even after cleaning. Learn practical solutions for lasting freshness and better indoor air quality.