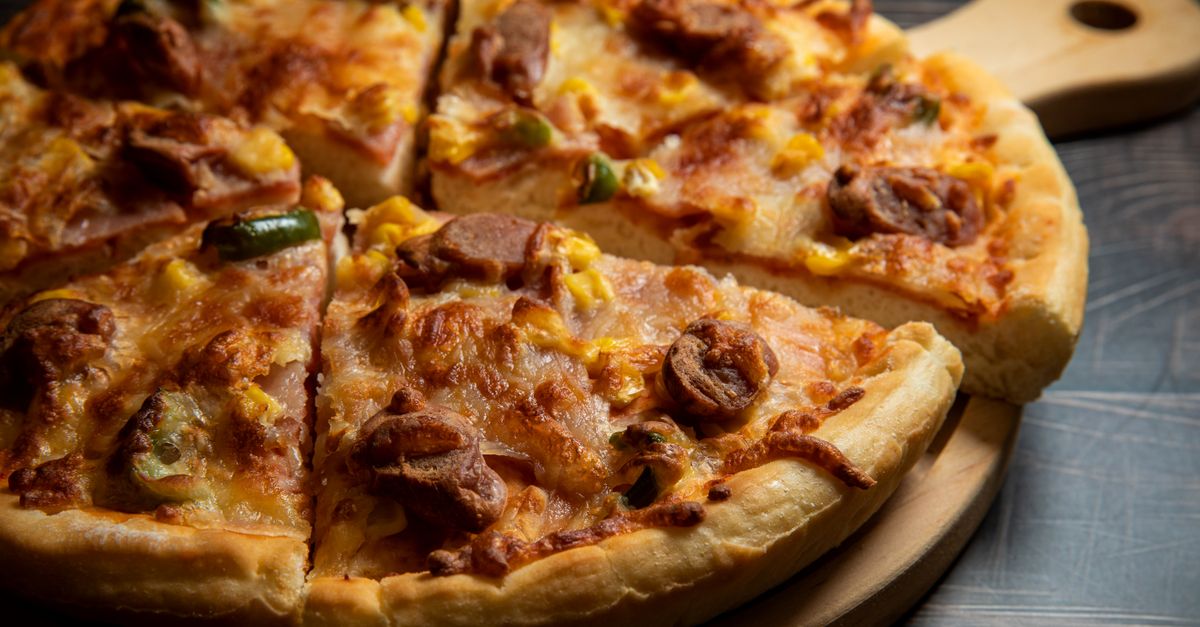
Why Your Homemade Pizza Crust Isn't Crispy (And The Pro Secrets That Deliver Pizzeria-Quality Crunch Every Time)
Have you ever pulled a homemade pizza from your oven, full of anticipation, only to be met with a limp, chewy crust that bends under the weight of its toppings? I certainly have. For years, my pizza nights were a cycle of hopeful baking and mild disappointment. Despite using quality ingredients and following recipes diligently, my crusts consistently lacked that satisfying snap and airy crispness that makes a great pizza truly memorable. They were edible, sure, but they were far from the kind of pizzeria-quality crunch I craved.
It wasn’t just a texture issue; it affected the whole experience. A soft crust makes every slice a balancing act, and the flavors often meld into a uniform chew rather than distinct, delightful bites. I experimented with different flours, tried hotter ovens, and even bought a fancy pizza stone, all to no avail. The problem wasn’t a single ingredient or piece of equipment; it was a deeper understanding of how heat, moisture, and dough interact to create that perfect, golden crisp. What I discovered through countless trials and a deep dive into professional techniques completely transformed my homemade pizza game. No more sad, floppy slices – just pure, unadulterated crispy joy.
Key Takeaways
- Achieve genuine crispness by prioritizing moisture removal throughout the baking process, starting with a well-hydrated but not wet dough.
- Maximize direct heat transfer using a preheated pizza steel (superior to a stone) to shock the dough and initiate rapid browning.
- Employ a ‘naked bake’ phase for the crust to develop structure and crispness before adding moisture-rich toppings.
- Manage topping moisture by pre-cooking watery vegetables and sparingly applying sauce to prevent steam and sogginess.
- Finish with a quick broiler blast to achieve extra char and an unbeatable golden-brown crisp on your crust.
The Fundamental Flaw: Too Much Moisture, Too Little Heat Shock
The biggest enemy of a crispy pizza crust is moisture, and the biggest ally is intense, direct heat. This might sound obvious, but the common mistakes people make stem from overlooking these two core principles. Think about a professional pizza oven: it cooks pizzas at incredibly high temperatures, often over 700°F (370°C), in just a few minutes. This extreme heat rapidly dehydrates the dough surface, creating a crisp exterior, while simultaneously cooking the interior through. The speed of this process is key – the dough doesn’t have time to steam itself into a soggy mess.
In a home oven, which typically maxes out around 500-550°F (260-290°C), we’re fighting an uphill battle. My initial mistake, like many, was simply increasing the bake time in an attempt to compensate for lower heat. This just led to dry, tough crusts that were still disappointingly soft. The real revelation for me was understanding that I needed to replicate the effects of a professional oven, even if I couldn’t match its temperature. This meant focusing on maximizing heat transfer and minimizing moisture at every possible step. It’s not about baking longer; it’s about baking smarter.
What changed everything for me was investing in a pizza steel. A pizza stone is good, but a steel is phenomenal. Steel is denser and conducts heat far more efficiently than stone, which means it transfers a much greater amount of thermal energy directly into the dough the moment it hits the surface. This rapid heat transfer creates that essential heat shock that instantly puffs up the crust and kickstarts intense browning and crisping. My recommendation? If you’re serious about crispy crusts, a good quality pizza steel, preheated for at least an hour at your oven’s highest temperature, is non-negotiable.
The Game-Changing ‘Naked Bake’ Strategy
This is perhaps the most counter-intuitive but effective technique I’ve adopted: the ‘naked bake.’ Most recipes instruct you to assemble your pizza fully, then slide it into the oven. The problem? Your dough, especially the center, spends valuable crisping time getting steamed by the moisture from the sauce, cheese, and toppings. It’s like trying to get toast crispy with butter and jam already on it.
The ‘naked bake’ solves this. After stretching your dough, I lightly brush the edges with a tiny bit of olive oil (optional, but helps with browning) and then, critically, slide the bare crust onto the preheated pizza steel. I let it bake, completely naked, for 3-5 minutes, depending on the oven and desired crispness. You’ll see the edges puff up dramatically, and the underside will start to develop those coveted brown blisters. This phase allows the crust to develop its initial structure and drive off a significant amount of surface moisture before any toppings are introduced.
Once the crust has set and gained some color, I pull it out, add my sauce and toppings (sparingly, as we’ll discuss), and then return it to the oven for the final bake. This method creates a crust that is not only crisp on the bottom but also strong enough to hold its own against the toppings, preventing that dreaded sag. It’s a two-stage baking process that prioritizes the crust’s texture, and it yields truly superior results.
Master Topping Management: Less is More (and Drier is Better)
Even with a perfectly executed naked bake, your efforts can be undone by overly wet or excessive toppings. Each ingredient on your pizza introduces moisture, which, when heated, turns into steam. This steam then gets trapped under your crust, turning it from crisp to soggy. This was another major ‘aha!’ moment for me. I used to pile on the sauce and load up every inch with cheese and vegetables, thinking more meant better. It actually meant soggier.
Sauce: Use less than you think you need. A thin layer, almost a whisper, is all that’s required for flavor. I also opt for a thicker, uncooked tomato sauce or even a simple crushed tomato base, rather than a watery cooked sauce, to minimize added moisture.
Cheese: While glorious, cheese contains a lot of water. Don’t overload it. Fresh mozzarella, in particular, should be patted dry or even pre-shredded and allowed to air dry slightly to reduce its moisture content. A mix of low-moisture mozzarella and a harder grating cheese like Parmesan often works best for both flavor and texture.
Vegetables: This is where many people go wrong. Watery vegetables like mushrooms, bell peppers, onions, and especially fresh tomatoes, release a lot of liquid when heated. My pro tip: pre-cook them. Sauté mushrooms until their liquid evaporates, roast bell peppers until tender, and pat dry fresh tomatoes. This extra step removes excess moisture before it can sabotage your crust, allowing the vegetables to caramelize beautifully without steaming your pizza into oblivion. Even pepperoni can release grease, so I sometimes pat off excess oil from slices before adding them.
The Broiler Blast: Finishing Strong for Ultimate Crunch
Once your pizza is assembled and returned to the oven after the naked bake, it needs a final push to achieve that perfect golden-brown, bubbly top and ultra-crispy edge. This is where your broiler comes in handy. Most home ovens offer a broiler setting, which provides intense top-down heat, mimicking the radiant heat from the top elements of a professional pizza oven.
In the last 1-2 minutes of baking, once the cheese is mostly melted and the crust looks nearly done, I switch my oven to the broiler setting. Keep a very close eye on it, as things can go from perfectly golden to burnt in a matter of seconds. The intense heat from the broiler will rapidly brown the cheese, blister the edges of the crust, and give any exposed dough a final crisping and char that is simply irresistible. This quick, high-heat finish is what truly elevates a good homemade pizza to an outstanding one, giving you that delightful combination of a perfectly cooked interior and a beautifully crisp, slightly charred exterior.
In my experience, this final step makes a dramatic difference. It creates those beautiful dark spots on the crust, known as leoparding, which are a hallmark of high-quality, crispy pizza. Just remember, vigilance is key. Stand by your oven, watch it like a hawk, and pull it out the moment it reaches your desired level of golden perfection.
The Dough: Hydration and Handling Matter
While heat and moisture management are paramount, the dough itself plays a critical supporting role. You need a dough that is hydrated enough to be tender and extensible but not so wet that it struggles to crisp up. My ideal pizza dough has a hydration level between 60-65%. Anything much higher can be challenging to handle and will release more steam during baking, making crispness harder to achieve.
Kneading: Proper kneading develops the gluten structure, which is what gives your crust its chew and helps it rise to create those airy pockets that crisp up beautifully. Don’t skimp on kneading time; whether by hand or machine, ensure the dough is smooth, elastic, and passes the windowpane test.
Fermentation: Give your dough ample time to ferment, ideally with a cold fermentation in the refrigerator for 24-72 hours. This develops flavor and makes the dough easier to work with. A well-rested dough will stretch more easily without tearing, allowing you to achieve a thinner base, which naturally crisps better.
Handling: When stretching, aim for an even thickness, especially in the center. Avoid a thick middle, which will remain soft. Many people instinctively leave the edges thicker to form a ‘cornicione’ (the puffy edge), which is fine, but focus on getting that base as thin as possible without tearing. Use a generous amount of semolina flour or cornmeal on your peel to prevent sticking, but shake off any excess before sliding the pizza into the oven – too much will burn and impart an off-flavor.
What truly made a difference for me in dough handling was learning to listen to the dough. If it’s resisting, let it rest for another 10-15 minutes. Trying to force it will lead to tears and uneven thickness. Patience here truly pays off in the final crispness.
Frequently Asked Questions
Q: Can I get a crispy crust without a pizza steel or stone?
Yes, but it’s harder. You can try preheating a heavy baking sheet or a cast-iron pan upside down in your oven at its highest temperature. While not as efficient as a steel, it will provide more direct heat than just baking on a rack. However, for truly consistent pizzeria-quality crispness, a pizza steel is highly recommended.
Q: My crust is crispy on the edges but still soft in the middle. What am I doing wrong?
A soft middle often indicates a few things: too much moisture (from dough hydration, sauce, or watery toppings), uneven dough thickness (middle is too thick), or insufficient heat transfer to the center. Try the ‘naked bake’ strategy, be more sparing with sauce and toppings, ensure your dough is evenly thin in the middle, and ensure your pizza steel or pan is thoroughly preheated.
Q: How do I prevent my pizza from sticking to the peel when transferring it to the oven?
Use a generous dusting of semolina flour or cornmeal on your pizza peel. Before assembling, give the dough a gentle shake on the peel to ensure it’s not sticking. Work quickly, and once toppings are on, give it one final shake before sliding it onto the hot steel. A quick, confident slide is key.
Q: What’s the best oven temperature for crispy pizza at home?
Always preheat your oven to its highest possible temperature, typically 500-550°F (260-290°C), with your pizza steel or stone inside, for at least an hour. This ensures maximum heat saturation, which is crucial for a crisp crust.
Q: Can I use a regular oven tray instead of a pizza peel?
You can, but it makes transfer more difficult. A pizza peel allows you to slide the pizza off smoothly. If using a baking tray, preheat it in the oven (upside down is best for direct heat transfer), then carefully build your pizza on parchment paper and slide the paper-and-pizza onto the hot tray. Remove the parchment paper after the naked bake to allow direct contact with the hot surface.
Q: My crust is too dry and hard, not crispy. What causes this?
Dry and hard, rather than crispy and airy, usually means the crust has been overbaked in an attempt to get it crisp. This often happens if the oven temperature isn’t high enough or the heat transfer isn’t efficient enough. Focus on the high heat shock from a preheated steel and the naked bake to achieve crispness quickly, without excessive bake time.
Conclusion: Embrace the Process, Savor the Crunch
Achieving that perfect, pizzeria-quality crispy pizza crust at home isn’t about magic; it’s about understanding and controlling the fundamentals of heat and moisture. By adopting strategies like the preheated pizza steel, the transformative ‘naked bake,’ meticulous topping management, and the finishing broiler blast, you can elevate your homemade pizza from good to truly exceptional. These weren’t quick fixes, but a shift in my entire approach to pizza making, born from countless trials and errors.
Don’t be discouraged if your first attempt isn’t flawless. Pizza making is a journey of continuous learning and delicious experimentation. Focus on these core principles, be patient with your dough, and attentive during the bake, and you’ll soon be pulling out pizzas with a crust so perfectly crisp, you’ll wonder why you ever settled for less. My challenge to you? Try the naked bake this weekend. It changed my pizza nights forever, and I’m confident it will change yours too.
Written by Sarah Chen
Home organization and productivity
A former consumer affairs journalist, Sarah has a knack for dissecting complex topics into digestible, actionable steps.
You Might Also Like
Why Your Homemade Bread is Dry and Crumbly (And The Simple Shifts That Guarantee a Light, Airy Loaf Every Time)
Stop making dry, crumbly homemade bread. Learn the simple shifts in technique and ingredients that guarantee a light, airy loaf every time.
Why Your Homemade Cookies Are Flat (And The Simple Fixes That Guarantee Perfect, Puffy Results Every Time)
Tired of flat, crispy cookies? Discover the crucial baking mistakes that cause spread and learn the simple fixes for perfect, puffy cookies every time.

Why Your Home Still Feels Stuffy (Even After Cleaning) — And What Actually Works for Real Freshness
Discover the hidden culprits making your home feel stuffy even after cleaning. Learn practical solutions for lasting freshness and better indoor air quality.