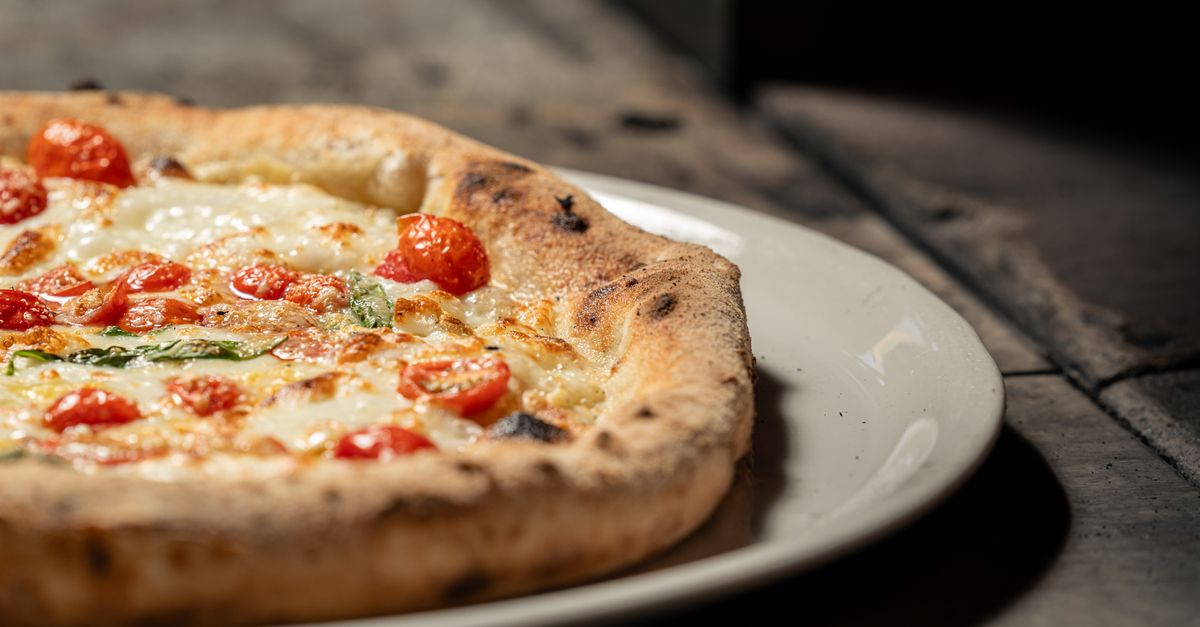
Why Your Homemade Pizza Crust Isn't Fluffy (And The Pro Secrets That Deliver Airy, Chewy Perfection Every Time)
Making pizza at home should be a joyous, rewarding experience. There’s nothing quite like the smell of a fresh pie baking, the anticipation of that first slice. But if you’re like many home cooks I’ve coached, you’ve probably faced the disappointment of a dense, tough, or flat pizza crust. You follow the recipe, you knead the dough, you’re careful with your toppings, yet the result is closer to a cracker than the airy, chewy crust you crave from your favorite pizzeria.
I’ve been there. For years, my homemade pizzas were… edible, but never truly great. The crust was my Achilles’ heel. I tried different flours, longer kneading times, even special pizza stones. It wasn’t until I started talking to professional pizzaiolos and understanding the science behind dough development that everything clicked. The mistakes I was making weren’t always obvious, and the solutions were often counter-intuitive. It turns out, achieving that light, fluffy, perfectly chewy crust isn’t about expensive equipment or exotic ingredients; it’s about mastering a few fundamental techniques and understanding what your dough really needs.
Key Takeaways
- Control your water temperature precisely to activate yeast optimally; too hot or too cold kills its potential for a fluffy rise.
- Prioritize high-protein bread flour for the necessary gluten structure that traps air, essential for a light, chewy texture.
- Embrace longer, slower cold fermentation to develop superior flavor and a more extensible, airy dough.
- Handle your dough gently during shaping to preserve crucial air bubbles formed during fermentation.
- Use a preheated pizza steel or stone to provide an intense, rapid heat shock, crucial for a quick, dramatic oven spring.
The Overlooked Enemy: Incorrect Water Temperature for Yeast Activation
When I first started baking, I treated yeast like a passive ingredient. Just add it to water, mix, and go, right? Wrong. The temperature of your water is paramount for yeast activation, and it’s a mistake I see most often. Too hot, and you kill the yeast, rendering your dough lifeless. Too cold, and the yeast remains dormant, leading to a sluggish or non-existent rise.
The mistake I made: I used warm tap water, assuming ‘warm’ was good enough. Sometimes it was too hot from the water heater, other times just lukewarm. This inconsistency led to unpredictable doughs – some would barely rise, others would have a faint yeasty smell but no real lift.
What changed everything for me: I started using a digital thermometer to measure my water temperature precisely. For active dry yeast, the sweet spot is typically between 105-115°F (40-46°C). Instant yeast is a bit more forgiving and can be mixed directly with dry ingredients, but even then, using water within this range ensures optimal activity. This small change – being obsessive about water temperature – was the first major step towards consistently fluffy crusts. It ensures your yeast is happy, active, and ready to produce the CO2 gas that gives your pizza its airy structure. Without properly activated yeast, no amount of kneading or resting will compensate.
The Gluten Myth: Why All-Purpose Flour Falls Short
Many beginner pizza recipes suggest all-purpose flour. While it works for many baking applications, it’s often the hidden culprit behind dense pizza crusts. The secret to that desirable chew and airy texture lies in gluten development. Gluten is the protein network that forms when flour and water combine and are kneaded. This network acts like tiny elastic balloons, trapping the carbon dioxide gas produced by the yeast, which causes the dough to rise and creates those lovely air pockets.
The mistake I made: I initially used whatever all-purpose flour I had in the pantry, thinking flour was flour. My crusts were always a bit tough, with a tight crumb, never developing the open, airy structure I coveted. They lacked the elasticity needed to stretch thin without tearing and spring back in the oven.
What changed everything for me: Switching to a high-protein bread flour (around 12-14% protein content) was a game-changer. European ‘00’ flour is popular for Neapolitan-style pizza for its finely milled texture and specific protein quality, but a good quality American bread flour works wonders too. The higher protein content in bread flour means more gluten can be developed. This extra gluten provides the strength and elasticity necessary to trap more gas, resulting in a lighter, chewier, and ultimately fluffier crust. When you’re kneading, you’ll feel the difference immediately – the dough becomes more pliable and less prone to tearing. This robust gluten structure is what allows your crust to puff up dramatically, creating the quintessential pizza experience.
The Patience Principle: Embracing Cold Fermentation for Superior Texture and Flavor
In our fast-paced world, it’s tempting to rush the dough-making process. Many recipes call for a quick 1-2 hour rise at room temperature. While this can produce an edible crust, it severely limits flavor development and the dough’s ultimate texture. The secret to a truly exceptional pizza crust isn’t speed, but patience, specifically through cold fermentation.
The mistake I made: I always followed the speedy room-temperature rise. My dough would double, sure, but the resulting crust often tasted one-dimensional – just like flour and yeast. It lacked the complex, slightly tangy flavor and the incredibly soft, airy interior that distinguishes truly great pizza.
What changed everything for me: I started experimenting with a 24-48 hour cold fermentation in the refrigerator. This is where the magic happens. At colder temperatures, the yeast works much slower, producing gases at a more controlled rate. This extended period allows enzymes in the dough to break down starches into sugars, leading to a more complex flavor profile with subtle nutty and fermented notes. Crucially, it also allows the gluten network to relax and strengthen without overworking it. The dough becomes incredibly extensible, easier to stretch without tearing, and develops a much more open, airy crumb structure. When you take the cold-fermented dough out of the fridge and let it come to room temperature for an hour or two before shaping, it springs to life, ready to deliver that fluffy perfection. This slow proofing is not just about flavor; it’s fundamental to achieving the desired light and airy texture.
The Gentle Touch: Preserving Those Precious Air Bubbles During Shaping
After all the careful attention to yeast and fermentation, many home bakers unknowingly sabotage their fluffy crust dreams during the shaping process. Vigorous rolling or rough handling can deflate the delicate air bubbles that have painstakingly formed during proofing, leading to a dense crust right before it even hits the oven.
The mistake I made: I used a rolling pin, or I’d slap and toss the dough aggressively, trying to get that perfect circle. The problem? Every time I did, I could literally feel the air escaping from the dough. My crusts would go into the oven looking thin and uniform, but they never got that dramatic puffiness at the edges.
What changed everything for me: I learned the art of gentle, hand-stretching. Instead of a rolling pin, I flour my hands lightly and start from the center of the dough ball, working my way outwards. I let gravity do most of the work, gently pulling and stretching the dough, rotating it as I go. The goal is to push the air to the edges, creating a slightly thicker ‘cornicione’ (the puffy rim). This technique preserves the internal air pockets, allowing them to expand dramatically in the hot oven. It takes practice, but once you get the feel for it, you’ll see a noticeable difference in the airiness of your crust. Think of it like a delicate balloon – you want to expand it, not pop it.
The Heat Shock Advantage: Why Your Oven Alone Isn’t Enough
Many home ovens simply don’t get hot enough, or they don’t transfer heat efficiently enough, to replicate a professional pizza oven. A standard baking sheet or directly on the oven rack won’t cut it if you’re chasing that coveted fluffy crust with a crispy exterior. The key is an intense, rapid heat shock.
The mistake I made: I used a thin metal baking sheet, or sometimes just placed the pizza directly on the oven rack. My oven would be preheated to 500°F (260°C), but the pizza would cook slowly, leading to a dry, cracker-like crust that lacked any real ‘oven spring’ – that dramatic puff and rise you see in pizzerias.
What changed everything for me: Investing in a pizza steel (or a very thick pizza stone) was a true revelation. Unlike a baking sheet, a pizza steel absorbs and retains a tremendous amount of heat. I preheat it in my oven at its highest setting (usually 500-550°F / 260-290°C) for at least 45 minutes to an hour. When the shaped pizza dough hits that superheated surface, it experiences a massive burst of heat. This causes the water in the dough to instantly turn into steam, creating a dramatic ‘oven spring’ that inflates the crust and sets its structure quickly. The result is a beautifully puffy, airy crust with a perfectly crisp bottom, achieved in a fraction of the time compared to traditional methods. If a steel or stone isn’t an option, preheating an upside-down cast iron skillet can offer a similar, albeit smaller, effect. The point is, you need that immediate, intense heat transfer to create steam and inflate your crust to its fluffy potential.
Frequently Asked Questions
Q: My dough feels very sticky and hard to handle. What should I do?
A: Stickiness is often a sign of good hydration, which contributes to a fluffy crust. Instead of adding more flour, which can make the crust dense, try working on a lightly floured surface with lightly floured hands. A bench scraper is also an invaluable tool for managing sticky dough. If the dough is excessively wet and unmanageable, you might have too high a hydration for your flour type; next time, slightly reduce the water or ensure you’re using a high-protein bread flour that can absorb more liquid.
Q: How do I know if my yeast is still active?
A: To test active dry yeast, proof it first. Combine the yeast with the specified amount of warm water (105-115°F or 40-46°C) and a pinch of sugar. Let it sit for 5-10 minutes. If it’s still active, it will become foamy and bubbly. If nothing happens, your yeast is likely dead, and you should use a fresh packet. Instant yeast typically doesn’t require proofing and can be added directly to the flour, but a quick foam test is always a good practice if you’re unsure.
Q: Can I use whole wheat flour for pizza crust?
A: Yes, but it will result in a denser, less airy crust. Whole wheat flour contains the bran and germ, which can interfere with gluten development, leading to a heavier texture. If you want some whole wheat flavor, I recommend using a blend of 75-80% bread flour and 20-25% whole wheat flour. This allows you to retain some of the desired fluffiness while incorporating the nutritional benefits and taste of whole wheat.
Q: My pizza crust edges are burnt, but the center is still pale. What am I doing wrong?
A: This often indicates your pizza steel/stone is too hot, or your oven’s top heating element is too strong compared to the bottom. Try lowering your oven temperature slightly (e.g., from 550°F to 500°F) or moving your pizza steel/stone to a lower rack in the oven. You can also try adding your pizza for the first few minutes, then rotating it, or even turning off the broiler (if it automatically comes on at high temps) once the crust has set to prevent burning while the center finishes cooking.
Q: Is a stand mixer necessary for good pizza dough?
A: While a stand mixer can make the kneading process much easier and more consistent, it’s absolutely not necessary. You can achieve excellent gluten development by kneading by hand. It takes a bit more time and effort (typically 10-15 minutes of vigorous kneading), but it’s a very satisfying process that allows you to truly feel the dough’s development. Just make sure to knead until the dough is smooth, elastic, and passes the ‘windowpane test’ (you can stretch a small piece thin enough to see light through it without tearing).
The Final Slice of Wisdom
Transforming your homemade pizza from good to genuinely great, with a crust that’s light, airy, and delightfully chewy, isn’t an impossible feat. It’s a journey of understanding your ingredients and respecting the process. By paying meticulous attention to yeast activation temperature, choosing the right high-protein flour, embracing the transformative power of cold fermentation, handling your dough with a gentle touch, and delivering that crucial heat shock in the oven, you’ll unlock a level of pizza perfection you might have thought was only possible from a professional pizzeria. These aren’t just tips; they are the fundamental shifts that made all the difference in my own pizza-making adventures. Take these insights into your kitchen, experiment, and prepare to impress yourself with every fluffy, flavorful bite. Happy baking!
Written by Sarah Chen
Home organization and productivity
A former consumer affairs journalist, Sarah has a knack for dissecting complex topics into digestible, actionable steps.
You Might Also Like
Why Your Homemade Bread is Dry and Crumbly (And The Simple Shifts That Guarantee a Light, Airy Loaf Every Time)
Stop making dry, crumbly homemade bread. Learn the simple shifts in technique and ingredients that guarantee a light, airy loaf every time.
Why Your Homemade Cookies Are Flat (And The Simple Fixes That Guarantee Perfect, Puffy Results Every Time)
Tired of flat, crispy cookies? Discover the crucial baking mistakes that cause spread and learn the simple fixes for perfect, puffy cookies every time.

Why Your Home Still Feels Stuffy (Even After Cleaning) — And What Actually Works for Real Freshness
Discover the hidden culprits making your home feel stuffy even after cleaning. Learn practical solutions for lasting freshness and better indoor air quality.