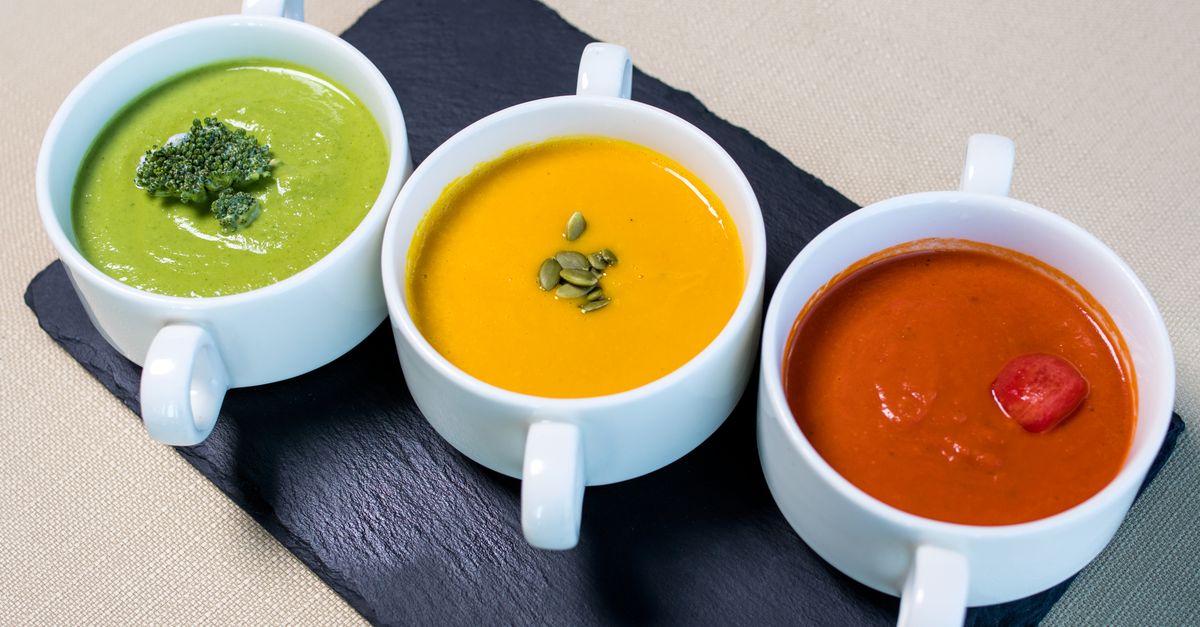
Why Your Homemade Soup is Bland (And The Flavor Secrets That Changed Everything For Me)
When I first started making soup at home, I was full of enthusiasm. Visions of hearty, aromatic bowls danced in my head. The reality? A watery, vaguely vegetable-flavored liquid that, while edible, tasted utterly bland. It was frustrating, especially after spending an hour chopping vegetables and simmering. I’d add more salt, more pepper, maybe a dash of dried herbs – but it never quite hit that comforting, deep, savory note I craved from restaurant soups or my grandmother’s kitchen. For years, I chalked it up to a lack of some mystical ‘cooking gene.’
What changed everything for me wasn’t a single secret ingredient, but a complete rethinking of how flavor is built, layer by layer, in a pot of soup. Most home cooks, myself included for far too long, make a few critical mistakes that prevent their soups from ever reaching their full potential. They treat all ingredients equally, rush key steps, and often miss the fundamental principles of extracting and concentrating flavor. If your homemade soup consistently leaves you wanting more, it’s likely one of these hidden pitfalls, and the good news is, they’re all easily fixable.
Key Takeaways
- Stop boiling your vegetables; sautéing aromatics deeply and browning meat creates foundational flavor through the Maillard reaction.
- Invest in good quality stock or make your own, as it’s the backbone of your soup’s taste, far beyond just water and bouillon.
- Build flavor in layers, adding ingredients at specific times to maximize their impact and prevent blandness.
- Don’t underestimate the power of finishing touches like acid, fresh herbs, and a touch of fat to elevate and balance the final taste.
The Fatal Flaw: Boiling Before Browning (The Maillard Reaction Myth)
The biggest mistake I see, and certainly one I made for years, is dumping all the ingredients into a pot of water or broth and bringing it to a boil. We’ve been taught that soup is a gentle, simmering affair, and while that’s true for the final stage, the initial steps are where flavor is born. The Maillard reaction, the complex chemical process that occurs when amino acids and reducing sugars react at high temperatures, is your best friend here. It’s what gives seared meat its delicious crust, roasted vegetables their sweetness, and deeply caramelized onions their incredible depth.
When you simply boil vegetables like onions, carrots, and celery (the holy trinity of aromatics for many soups), you’re extracting some flavor, yes, but you’re leaving behind a vast, untapped reservoir of complex taste. There’s no browning, no caramelization, and therefore, no Maillard magic. The result is a ‘clean’ but ultimately flat flavor profile. This is especially true for any meat you might be adding; if you don’t brown it first, you’re missing out on immense savory depth.
What actually works: Start with fat (oil or butter) in a hot pot. Add your aromatics (onions first, let them soften and brown slightly, then carrots and celery). Don’t rush this. This phase, often called building the mirepoix or soffritto, should take 10-15 minutes, sometimes even longer, over medium heat. You want to see golden-brown bits forming on the bottom of the pot. Those aren’t burned; those are pure flavor. If you’re adding meat, sear it in batches until deeply browned on all sides, then remove it, and then proceed with your aromatics, using the leftover browned bits in the pot to your advantage. This single step will fundamentally transform your soup from bland to profound.
The Weak Link: Subpar Stock (Watered-Down Dreams)
Many home cooks treat stock as just a liquid base, assuming the other ingredients will carry the flavor. This is a monumental misstep. Stock, whether vegetable, chicken, or beef, is the very backbone of your soup. If your backbone is weak, your whole structure will collapse. Using plain water, or worse, cheap, watery bouillon, is a surefire way to guarantee a bland soup, no matter how much browning you do.
Think about it: a good quality stock is made by simmering bones (for meat stocks), vegetables, and aromatics for hours, slowly extracting collagen, amino acids, and complex flavors that simply cannot be replicated by throwing a cube into hot water. This gives your soup a body and mouthfeel that water can’t provide. It’s the difference between a thin, unsatisfying broth and a rich, enveloping liquid that coats your palate.
What actually works: My personal revelation was when I started making my own chicken stock. It’s surprisingly easy, incredibly economical, and makes a world of difference. You can use leftover roasted chicken carcasses, vegetable scraps, and a few aromatics. Simmer it for 4-6 hours, and you’ll have a gelatinous, incredibly flavorful liquid. If making your own isn’t feasible, invest in the highest quality, low-sodium boxed stock you can find. Look for brands that list real ingredients, not just ‘natural flavors.’ Taste your stock on its own before you add anything else. If it tastes good, your soup has a fighting chance. If it tastes like salty water, your soup is doomed before it even begins. Don’t be afraid to reduce your stock a bit if it tastes too weak, concentrating its flavor before adding other ingredients.
The Overwhelm Trap: One-and-Done Seasoning (The Layering Principle)
Another common pitfall is the ‘one-and-done’ seasoning approach. People add salt and pepper at the very end, hoping it will magically fix a bland soup. Seasoning isn’t a bandage; it’s an integral part of the cooking process, built in layers, just like flavor. Adding all your salt at the end means it hits your tongue immediately, often making the soup taste too salty without actually enhancing its depth.
Different ingredients release their flavors at different times, and require seasoning at different stages. Herbs, spices, and salt all play distinct roles and should be introduced strategically. If you add delicate fresh herbs too early, their flavor dissipates. If you add hardy dried herbs too late, they won’t have time to bloom.
What actually works: Embrace the layering principle of seasoning. Add a pinch of salt with your aromatics to help draw out moisture and promote browning. Introduce dried herbs and spices (like bay leaves, thyme, paprika, cumin) to the hot fat after your aromatics have softened and before adding liquid. This ‘blooming’ in hot fat unlocks their fat-soluble flavor compounds, making them more potent and aromatic. Taste and adjust seasoning as you go, especially after adding the stock and simmering. Remember that as soup reduces, salt becomes more concentrated. Hold back some salt until the very end, then add small pinches, tasting after each addition. Finally, add fresh herbs (like parsley, cilantro, basil) only in the last few minutes of cooking or as a garnish. Their volatile oils are delicate and provide a burst of freshness that complements the deeper, cooked-in flavors.
The Neglected Finish: Ignoring Brightness and Balance (The Acid and Fat Factor)
After all that simmering and layering, a soup can still feel like it’s missing something. It might be savory and hearty, but perhaps a bit flat or heavy. This is where many home cooks stop, unaware of the magic that happens with finishing touches. The missing elements are often acid and a touch of fat, which provide brightness, contrast, and balance to richer flavors.
Think about why a squeeze of lemon juice makes a roasted chicken sing, or why a drizzle of olive oil enhances a fresh salad. These aren’t just for show; they’re crucial for awakening and rounding out flavors. In a soup, particularly one that’s been simmering for a while, these elements can be lost or simply never added, leading to a dull, one-note experience.
What actually works: Always have a source of acid and a rich fat ready at the end. A squeeze of fresh lemon juice, a splash of red wine vinegar, a dash of sherry vinegar, or even a teaspoon of apple cider vinegar can cut through richness and add a vibrant lift that makes all the other flavors pop. You won’t necessarily taste the lemon or vinegar specifically; you’ll just taste more flavor overall. For fat, a swirl of good quality olive oil, a knob of butter, a spoonful of crème fraîche, or even a sprinkle of grated Parmesan cheese can add luxurious mouthfeel and carry fat-soluble flavors directly to your palate. This also contributes to the ‘satiety’ factor, making the soup feel more satisfying. Don’t skip these final touches; they transform a good soup into a great one. My go-to for many vegetable soups is a dash of sherry vinegar and a drizzle of really good olive oil just before serving.
The Forgotten Ingredient: Time (Rushing the Magic)
In our fast-paced world, it’s tempting to want soup now. Many recipes promise quick soups, and while some are perfectly fine, truly flavorful soups often need time. Not just active cooking time, but simmering time. This is where the magic of flavor melding occurs.
Rushing the simmer means the vegetables don’t fully break down and release their sweetness, the spices don’t fully bloom and integrate, and the liquid doesn’t have a chance to concentrate. It’s like pulling a cake out of the oven too early – it looks done, but it’s raw in the middle.
What actually works: Plan for adequate simmering time. After adding your liquids and main ingredients, bring the soup to a gentle simmer, cover partially, and let it do its work. For most hearty vegetable or bean soups, this means at least 30-60 minutes. For meat-based soups, it can be even longer, allowing tough cuts of meat to tenderize and release their collagen, enriching the broth further. A slow, gentle simmer, where you see only an occasional bubble, is ideal. Boiling too vigorously can break down delicate ingredients too quickly and make the broth cloudy. I often find that soups taste even better the next day, after the flavors have had more time to meld and deepen overnight. If you’re really short on time, consider a pressure cooker for specific components, but don’t rush the initial browning steps, as that’s irreplaceable.
The Texture Oversight: Uniformity Without Interest (The Power of Contrast)
Beyond flavor, the experience of eating soup is deeply tied to texture. Bland soup often correlates with bland texture – everything is soft and uniform, offering no contrast or point of interest. A great soup engages multiple senses, and varying textures are key to preventing palate fatigue.
Most people focus solely on the ‘chunkiness’ of their ingredients, but forget about layers of texture, from creamy to crunchy, from tender to crisp. When everything is the same consistency, the soup becomes monotonous, even if the flavor is decent.
What actually works: Think about adding textural contrasts. For creamy soups, leave some of the vegetables chunky, or add a garnish of toasted nuts or croutons for crunch. For brothy soups, consider adding a sprinkle of crispy bacon bits, a dollop of fresh ricotta, or a swirl of pesto for a different mouthfeel. Even how you chop your vegetables can impact texture; varying the size can create more interest. My favorite trick is to reserve a small portion of a vegetable, like carrots or celery, and add it in the last 10-15 minutes of simmering. This keeps some pieces with a bit more bite, providing a pleasing textural counterpoint to the softer, fully cooked elements. Don’t puree everything if you’re aiming for a creamy texture; a small portion of un-pureed ingredients adds depth. This small detail might seem minor, but it’s the difference between a bowl you finish out of obligation and one you savor.
Frequently Asked Questions
Q: Can I really make flavorful soup without meat stock? I’m vegetarian/vegan.
A: Absolutely! The principles of browning aromatics and building layers of flavor apply universally. For depth, use a high-quality mushroom or vegetable stock. Roasting vegetables (like carrots, onions, tomatoes, mushrooms) before adding them to your soup base can also create incredible umami and depth that rivals meat stocks. A splash of soy sauce or tamari, a spoonful of miso paste, or nutritional yeast can also add profound savory notes to vegetarian soups.
Q: My soup still tastes too salty after simmering. How can I fix it?
A: If your soup is too salty, resist the urge to add more water, as this will just dilute all the other flavors. Instead, try adding a peeled, quartered potato to the simmering soup for 15-20 minutes. Potatoes can absorb some excess salt. Another option is to add a splash of acid (lemon juice or vinegar) or a creamy dairy product (like unsweetened coconut milk, crème fraîche, or heavy cream), as these can help balance and mask the perception of saltiness. Be cautious with initial seasoning and taste often, especially after reduction.
Q: How do I get those little browned bits (fond) off the bottom of the pot without burning them?
A: The key is deglazing. After browning your aromatics or meat, add a cold liquid (like wine, stock, or even water) to the hot pot. Use a wooden spoon or spatula to scrape up all those delicious browned bits from the bottom. This process incorporates all that concentrated flavor into your soup base. Make sure the heat isn’t too high when you deglaze, or you risk burning the fond.
Q: Should I add fresh or dried herbs? When is the best time?
A: It depends on the herb and the desired effect. Dried herbs (like bay leaf, dried thyme, oregano, rosemary) are best added earlier in the cooking process, typically with your aromatics after they’ve softened and you’ve deglazed the pot. This gives them time to rehydrate and release their more robust, earthy flavors. Fresh, delicate herbs (like parsley, cilantro, basil, chives) should be added at the very end of cooking, or as a garnish. Their vibrant, fresh notes are easily lost with prolonged cooking, but they provide a crucial burst of brightness to the finished dish.
Q: What if my soup is too thin? How do I thicken it without adding flour?
A: There are several ways to thicken soup naturally. You can remove about 1-2 cups of the finished soup, blend it until smooth, and then stir it back into the pot. The pureed vegetables will add body and creaminess. Another option is to mash some cooked potatoes or beans directly into the soup, or stir in a spoonful of cornstarch or arrowroot powder mixed with a little cold water (a slurry) right at the end of cooking. Simmer gently for a few minutes until thickened.
Learning to make flavorful soup is less about following a rigid recipe and more about understanding the principles of flavor building. By focusing on deep browning, using quality stock, layering your seasonings, and finishing with brightness and texture, you’ll move beyond bland broths to create truly comforting, deeply satisfying bowls. Take these insights into your kitchen, and you’ll find that transforming your soup, and your cooking confidence, is more achievable than you ever thought possible. Embrace the process, taste as you go, and prepare for a flavor revolution in your soup pot.
Written by Marcus Thorne
Health, wellness, and sustainable living
With a background in community health, Marcus focuses on wellness routines and sustainable living practices.
You Might Also Like
Why Your Homemade Bread is Dry and Crumbly (And The Simple Shifts That Guarantee a Light, Airy Loaf Every Time)
Stop making dry, crumbly homemade bread. Learn the simple shifts in technique and ingredients that guarantee a light, airy loaf every time.

Why Your Homemade Cookies Are Flat (And The Simple Fixes That Guarantee Perfect, Puffy Results Every Time)
Tired of flat, crispy cookies? Discover the crucial baking mistakes that cause spread and learn the simple fixes for perfect, puffy cookies every time.

Why Your Home Still Feels Stuffy (Even After Cleaning) — And What Actually Works for Real Freshness
Discover the hidden culprits making your home feel stuffy even after cleaning. Learn practical solutions for lasting freshness and better indoor air quality.